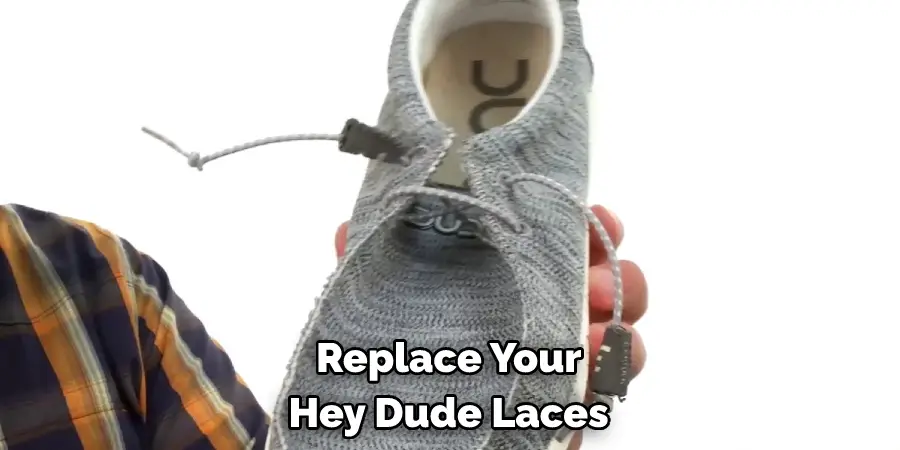
Are you tired of dealing with the frustrating task of replacing your worn out laces on your favorite pair of hey dude shoes? If so, you’re not alone! Many people find that replacing their laces can be a real hassle, requiring dexterity and patience to get the job done right.

Replacing your Hey Dude laces can be a great way to revamp an old pair of shoes or add pizazz to any other projects you have going on. Whether knit, woven, patterned, reflective, or anything in between, these laces come in all sorts of styles and lengths for whatever look you’re looking for. Not only are they affordable and fashion-forward, but they are easy to replace too!
This post will explain how to replace hey dude laces so that even beginners can bring new life into their shoes.
What Will You Need?
To replace your hey dude laces, you will need the following:
- A pair of shoes with broken or worn out laces
- A new set of replacement laces for your shoes
- A pair of scissors or another sharp tool to cut the old laces
- Tape measure (optional)
Once you have all of your supplies ready, you can get started on replacing your laces.
10 Easy Steps on How to Replace Hey Dude Laces
Step 1. Remove the Old Laces:
To begin, you will need to remove the old laces from your shoes. This may involve undoing any knots or other fasteners that are holding the laces in place, or simply cutting the old laces with scissors. Be careful not to damage your shoes in the process.
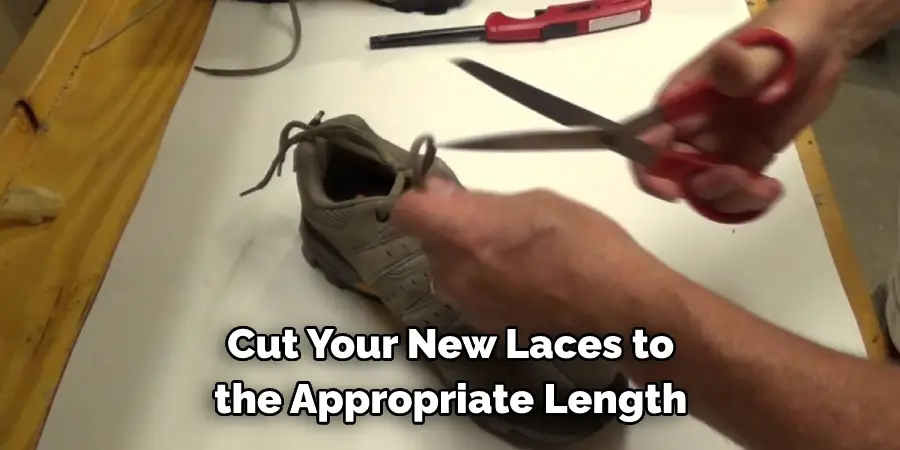
Step 2. Measure and Cut Your Laces:
Next, you will need to measure out and cut your new laces to the appropriate length. If you are replacing a shorter lace, you can simply cut it to size, but for longer laces, you may want to use a tape measure or ruler to get an accurate measurement. Be sure not to leave any excess lace hanging off your shoes’ ends.
Step 3. Thread Your Laces:
Now that your laces are all cut to size, you can begin threading them through your shoes. Depending on how they were originally laced, this may be easy or more difficult than expected. You may need to make minor adjustments along the way if the laces aren’t lining up with each other or with eyelets in the upper portion of the shoes.
Step 4. Secure Your Laces:
Once your laces are threaded through the eyelets of your shoes, you can begin to secure them in place by tying a knot at the end. Depending on how long you made your laces, you may want to use two or more knots to ensure that they will stay in place and not come undone during wear. If you have any extra lace left over, you can tie it into a bow or tuck it away within the shoe for a clean, finished look.
Step 5. Use Lace Keepers:
If you are concerned about your laces coming untied or rubbing against the inside of your shoe, you may want to use lace keepers to hold them in place. These can be purchased at most shoe and craft stores, or you may even try using small pieces of tape or other small, discreet items to achieve the same effect. It will help keep your laces from getting too tangled or caught during wear.
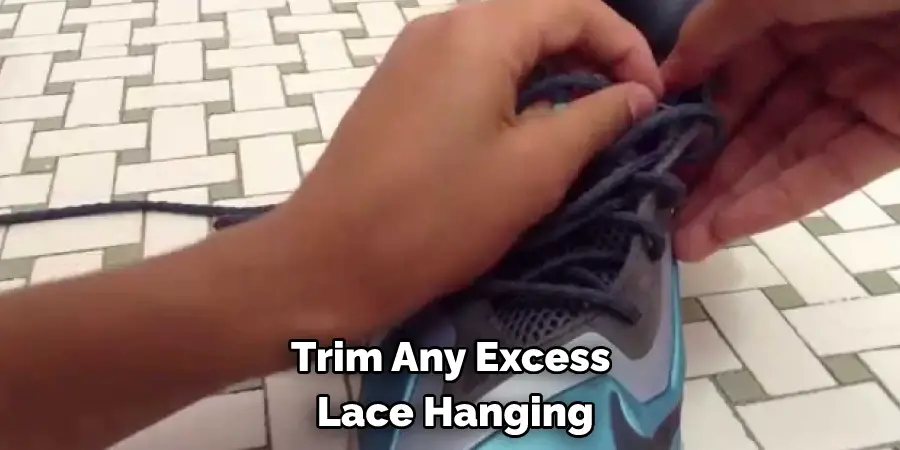
Step 6. Trim Any Excess Lace:
Once you have your laces secured how you like, take some time to trim any excess lace hanging off the ends or sticking out of the sides of your shoes. This will help you achieve a polished, finished look and prevent any irritation or discomfort during wear. Moreover, it will help your shoes look neat and professional, no matter how long you wear them for.
Step 7. Modify Your Lacing Technique:
Depending on how your laces are currently laced and how you like the fit of your shoes, you may want to modify how you lace them up. For example, if you have a higher instep or your laces feel too tight, try experimenting with different techniques like crisscrossing the laces or tying them in a bow at the top. This will help improve the overall fit and comfort of your shoes and may even make it easier to replace your laces in the future.
Step 8. Use Your Laces for Other Projects:
If you are looking for new ways to use your hey dude laces after replacing them in your shoes, consider how else they can be incorporated into other projects. Perhaps you could add reflective strips to create added safety when walking at night, weave them through canvas shoe laces for a more customized look, or even make them into bracelets or keychains as fun, personalized gifts. There are plenty of ways to put your laces to good use and get the most out of your investment.
Step 9. Try Different Styles and Colors:
If you want to mix up your look or simply want to change things up, consider trying different styles and colors of laces. This may involve changing how they are threaded through the eyelets, experimenting with different knots, or even trying out new techniques like hidden or ladder lacing. With so many options available, there is no shortage of ways to experiment and express yourself through your shoes. So why not give it a try today?
Step 10. Maintain Your Shoes:
Along with replacing your hey dude laces, it is also important to take care of your shoes in general. This includes cleaning them regularly, applying protectants like shoe cream or leather conditioner as needed, and storing them properly when not in use. By keeping your shoes well-maintained and cared for, you can ensure that they will last for many years to come and continue looking great no matter how often you wear them. And with the help of new laces to keep things fresh, there’s never been a better time to upgrade your look!

By following these steps, you can easily replace your hey dude laces and get the most out of your shoes. Whether you want to improve how they fit or simply give them a new look, replacing your laces is an easy way to update your style and keep your footwear looking great for years to come. So why wait? Start using these tips today and transform your look and feel in no time!
5 Additional Tips and Tricks
1. The first step in replacing your laces is to remove the old ones from your shoes. This can be done by simply untying them and pulling them out from the inside of your shoe.
2. If your laces are particularly worn or frayed, you may need to cut them off before replacing them. Use sharp scissors to snip the laces and remove any excess material carefully.
3. Avoid using regular cotton laces in your shoes, as these tend to stretch and become loose over time. Instead, opt for high-quality nylon or polyester laces, which are more durable and will hold their shape better.
4. When replacing your laces, ensure you leave enough length at the end of each lace so you can tie them securely. This means allowing a few extra inches on both sides when cutting your new laces to length.
5. To ensure that your new laces stay tied and don’t come undone throughout the day, try using double knots instead of single ones when tying your shoes. Pull both ends of the lace tight after making each knot to ensure it is secure and won’t budge.
And there you have it – a quick and easy guide to replacing your laces and keeping your shoes looking great!
What Are the Things on the Laces of Hey Dudes?
The laces of a hey dude are typically made from a high-quality nylon or polyester material. They may also include reflective strips, decorative patterns, or other features to increase functionality and customization.
The things on the laces can vary depending on the style and design of the shoes but often include eyelets, knots, loops, and other components that help to keep them securely tied and in place.
If you are looking for ways to replace your hey dude laces or want to learn more about how they work, be sure to consult an expert in shoe care or do some research online for additional tips and tricks.
Conclusion
While there are many ways to replace your laces, the “Hey Dude” technique is by far the most popular. This lace-replacement method is simple and effective, leaving your shoes looking better than ever. So next time you need to replace your laces, be sure to try the Hey Dude method – you won’t regret it!
In conclusion, following the steps above will ensure you get the best fit for your Hey Dudes. Keep in mind that there is a small learning curve when it comes to getting used to how these shoes feel without laces, but once you do, you’ll never go back!
Hopefully, the article on how to replace hey dude laces has been helpful, and best of luck in your own shoe-care endeavors.