Cleaning your cycling shoes is necessary, but it’s not always easy to know where to start. In this article, we’ll walk you through the process of how to wash cycling shoes so that they stay in good condition for as long as possible. Read on for more information!
Cleaning your cycling shoes is an essential part of taking care of them and ensuring that they perform their best. So, whether you are a beginner or an experienced cyclist, keep reading for the best tips on how to clean your cycling shoes!
Things You’ll Need
- Mild soap (not detergent)
- Towel
- Old toothbrush for scrubbing
A Step by Step Guide on How to Wash Cycling Shoes
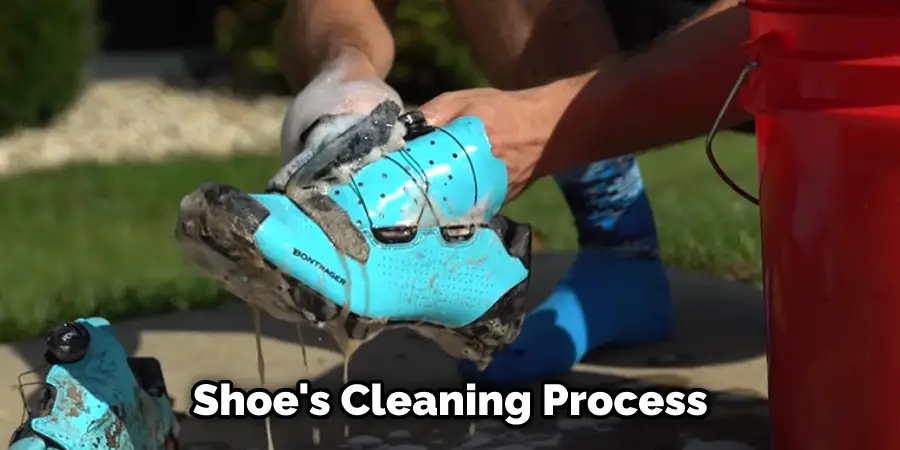
Step 1: Preparation
There are several ways to clean cycling shoes, depending on the materials they’re made from. How you wash your cycling shoes will depend mainly on how dirty they are. In addition, there may be a specific method that comes with the brand of shoes you purchased, which can help keep them long-lasting and perform well for many seasons.
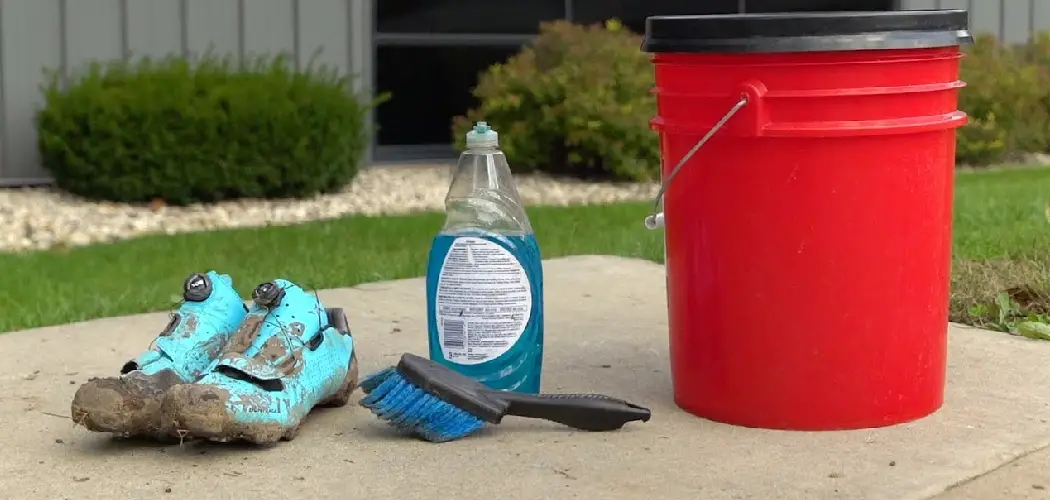
When washing biking shoes, the first thing you should do is prepare a mixture of mild soap and water – not detergent as it can leave a residue behind. You’ll also need an old toothbrush or soft brush to scrub any caked-on dirt off the shoe’s fabric surface. It’s best to work in sections rather than do everything simultaneously, so you don’t miss any spots.
Step 2: Rinsing
After scrubbing the shoe with your brush, rinse it thoroughly with water to remove all traces of the soap. The shoe should now be free from dirt and shampoo residue. If areas on the shoe have dry mud caked on, you can try using a wet rag to wipe it off before rinsing. How long you let your shoes soak for will depend on how badly they need cleaning.
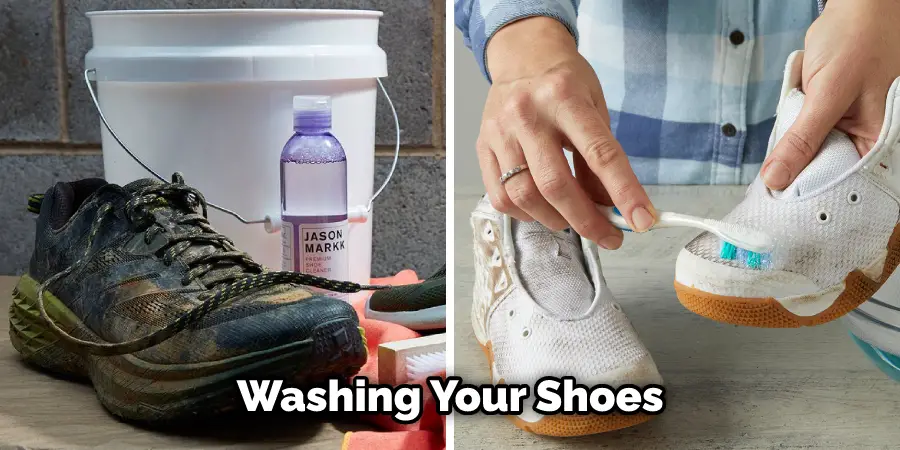
Step 3: Washing
Place the shoes in a container and fill it with warm water. Add a small amount of mild soap to the water, or follow whatever directions are on your specific shoe’s cleaning process. How long you let them soak for will depend on how dirty they are and what materials they’re made from. It’s best to check the shoe’s tag for specific care instructions.
Your shoes may be made of mesh, perfect for washing in a dishwasher. However, if your shoes are filthy, it’s probably better to scrub them by hand with an old toothbrush or soft brush rather than risk ruining them in the dishwasher.
Step 4: Scrubbing
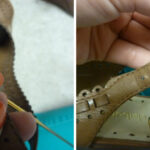
You can use a toothbrush for callous spots, but don’t use anything more complicated than plastic as it might damage the fabric’s surface. For leather cycling shoes, soak them first before rubbing on some soap until they produce bubbles. Once they do, remove excess water by blotting with a towel and then put the shoes on.
Using a clean towel, rub off any caked-on dirt to expose the smooth surface underneath. Use an old toothbrush or sponge to scrub away anything that remains, and once finished, pat dry by blotting with a towel. Inspect your shoes thoroughly for areas with excess dirt and rewash if necessary.
Step 5: Drying
After washing, allow your cycling shoes to dry completely before putting them away, as moisture can damage their surfaces. Drying shoes will depend on how wet they are. If they’re nearly dripping, place them over a radiator or heater as air drying could take several days or weeks, depending on conditions. Drape over a heating vent or a radiator for cycling shows only slightly damp.
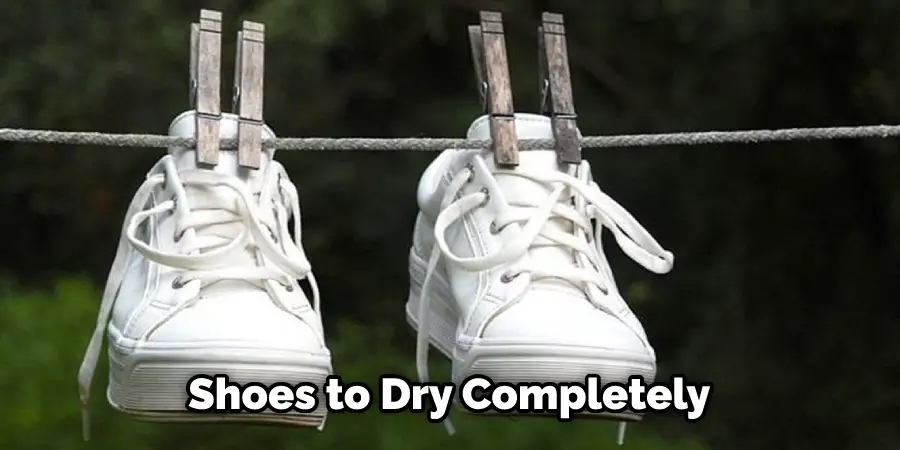
Duration of drying will depend on the shoes’ material and design. For example, leather cycling shoes take longer to dry as they absorb a lot of moisture than,s which ca,n, sometimes be completely dry in a matter of hours depending on conditions. Polyester cycling shoes should never be put near heat, damaging their surfaces or warping their shape.
Washing your cycling shoes is up to you, but over time dirt builds up, and skin cells from your feet can lead to odors. In addition, bacteria love moist environments, so washing allows for proper ventilation that prevents odors, along with helping your shoes last longer. After each use, please give them a quick wipe before storing them away in an airtight bag.
Avoid keeping them in direct sunlight or near heat to prevent yellowing while putting them away in a dry area will help avoid damaging the fabric’s surface. If they’re entirely wet, wait until they’re scorched before wearing them; otherwise, dampness trapped inside could cause discomfort later on. This is a crucial step in how to wash cycling shoes.
Step 6: Deodorize
If washed regularly, your cycling shoes shouldn’t develop odors that cause discomfort. Still, you might want to give them a quick deodorizing once in a while, which is safe to do as long as they’re scorched.
For synthetics like polyester and nylon, sprinkle some cornstarch over the entire shoe (avoiding the fabric surface) and let it sit for several hours or overnight. Once absorbed, brush off any excess powder with an old toothbrush before wearing it.
For leather cycling shoes, grab a small bowl and mix water and baking soda until it forms a paste – not too thin but not too thick either. Then apply directly to any stinky spots with a clean cloth or sponge and leave for up to 5 minutes before rinsing with water. Once clean, leave them outside or near a window to dry completely before putting them away.
Step 7: How Often You Wash Shoes
For regular riders, washing your shoes at least once every month should be enough but even less if you regularly clean your cycling jerseys after each use. However, suppose you occasionally ride in controlled conditions with little dirt buildup. In that case, you can get away with stuff like wiping it down with a damp rag and leaving it in the sun for a few hours, which is usually enough for most casual riders and commuters.
For racers and heavy riders, washing your shoes every two weeks to once a month would be ideal since you’re more likely to accumulate dirt that can cause discomfort. How often you wash cycling shoes is up to you but consider that the more often they’re washed, the longer they’ll last compared with being left dirty, which will wear them down faster, especially if it’s from daily use.
When riding in wet conditions, stuff a plastic bag inside each shoe so moisture doesn’t damage its surface when dried later on.
Step 8: Keep Your Shoes Ready for the Next Ride
wearing cycling shoes when walking around is already bad for them due to the pressure put on their surfaces, leading to early damage. So avoid walking with them inside your home or making sudden or sharp turns, especially when wearing socks, since they could damage their buckles and straps. Instead, keep your gloves nearby so you can slip in your feet without having to walk around.
How often you wear cycling shoes will depend on how active you are, but if you’re an avid rider, it’s best not to leave them out where people walk but instead store them away in a safe place once dry after washing.
When not in use, always stuff the shoes into a mesh bag and any other parts that can get caught up, such as cleats and straps. How you store them is up to you, but with shoes that have buckles, it’s best to leave the straps out so they don’t get stuck on anything and snap off, which could end up damaging other components.
Also, when storing items like cleats and cycling caps, always stuff them inside a shoe instead of wrapping them around its straps as this can cause damage if too tight.

Lastly, store your cycling shoes away from direct sunlight or where there’s heat because these can make leather soles and insoles crack while yellowing polyester and nylon fabrics over time.
Finally, avoid moisture by keeping bags and covers sealed tightly while letting them dry thoroughly before putting them away between uses – especially if they’re damp due to sweat since trapped moisture will only accelerate their deterioration. These steps will help in how to wash cycling shoes.
You Can Check It Out to Get Tar Off of Shoes
Tips and Warnings
Tips
- Use a toothbrush to scrub anything that may be too small to reach with your hands
- Wash them in cold water and add detergent only if the shoes are filthy
- Hang dry any insides that have been removed from the shoes, such as tongues and linings. This will help keep them clean until they’re ready to be used again.
Warnings
- Don’t use chlorine bleach
- Avoid washing with another load of clothes
- Don’t use a dryer
You Can Check It Out to Make Shoes More Slippery for Dancing
Conclusion
I hope you have gone through the article on how to wash cycling shoes. We all know how important it is to keep our cycling shoes clean. Dirty, smelly, or wet cycling shoes can lead to bacteria and fungus growth that affects your health and the safety of other riders on the road should you come in contact with them. Luckily for us, there are many ways we can safely wash our cycling shoes, so they don’t smell funky when we put them back on!
You can Also Check It Out To How to Clean Minnetonka Slippers