Embroidering shoes is a great way to add some personality and style to an otherwise plain pair of shoes. It’s also a relatively straightforward process, so even beginners can give it a try. In this article, we’ll show you how to hand embroider shoes in just a few simple steps.
Shoes, We all have them, and we all love them. Whether we’re into sneakers, pumps, sandals, or something in between, there’s nothing quite like a new pair of shoes to make us feel good about ourselves. It’s a fun way to add some personality to your shoes and keep them looking fresh for longer. Here’s how to get started.
A Detailed Guide on How to Hand Embroider Shoes
Step 1: Trace a Pattern
To make a pattern for shoes, first, we need to take the measurements of the shoes. Then, if you do not have any tracing paper, draw it out or use a newspaper and cut around your foot shape – that will provide you with plenty of room to work with. Next, draw a line perpendicular from where your toes are pointing to about halfway up your instep.
Then connect from there until it meets just below the ankle bone on the outside edge of the heel. Each shoe needs four pieces: one for each side and two for the top/bottlecap. Place them together, lining up all parts as perfectly as possible before pinning so you can be sure they match when sewn together.
Step 2: Place the Tracing Paper on the Leather
Place the tracing paper (right-side up) onto a sturdy work surface like a cutting mat or clean kitchen counter. The Leather should be placed right side down, and your stocking foot should be evenly centered on top of it.
If you want to make two separate shoes, cut out another piece of Leather, place it over the first piece, and trace around both sides. For future projects, if you need more than one pair of shoes, keep in mind that they will only go together perfectly if each set is traced simultaneously with matching pattern pieces; this is important for lining up all parts correctly during assembly.
Step 3: Spray the Back of the Leather
Be sure the entire backside is coated thinly with the adhesive, but not so much that it would cause slipping or wrinkling as you trace around your stocking foot. Let this sit for 15-20 minutes to dry the adhesive before continuing.
In most cases, it will be fine if you put something heavy on top of it to hold it down or use your body weight along with some binder clips to secure everything in place. If you are concerned about possible slipping, do a quick test run by first tracing a pattern onto scrap leather.
Step 4: Place the Embroidery Hoop Into Place
Place the embroidery hoop into position (see How to Use an Embroidery Hoop ) and tighten until there is no slack, but not so tightly that it will damage the Leather. Some people prefer to use their fingers alone to tighten it; others use a screwdriver or anything else handy for assistance. The important thing is that the tension on both sides of your project is equalized.
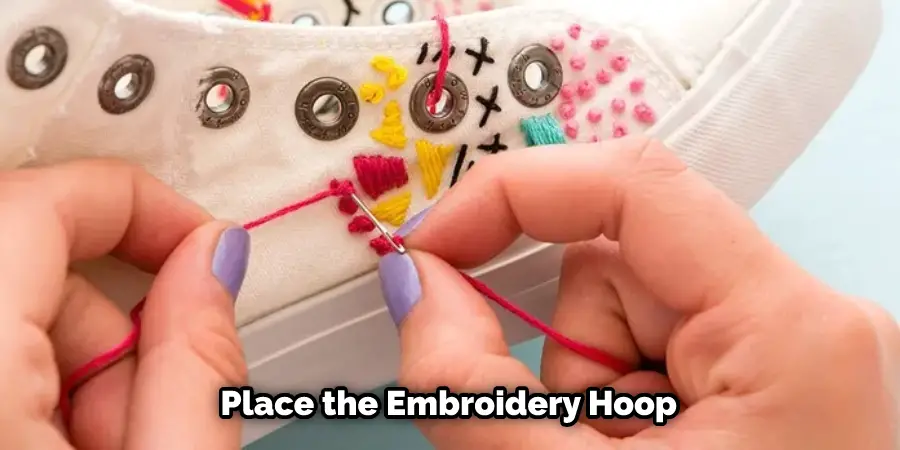
Step 5: Place One Ring on Top of the Leather
When you have not used a particular hoop before, place a piece of fabric or paper between your project and the outside ring. This will prevent “fuzzies” from sticking to the inside of the hoop. How often this is necessary depends on how well you clean your hoops between uses. Most people find it is rarely an issue once they have been using a specific size for a while.
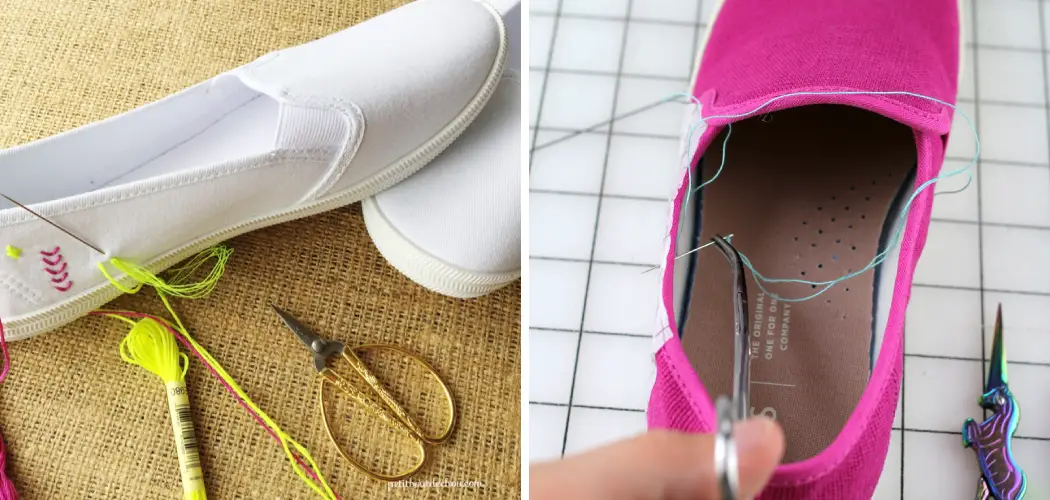
Step 6: Thread Your Needle
I prefer to use a small chenille needle with a large eye and about a medium length for this project. How many needles you need will depend on how tightly your embroidery thread is wound onto the spool. If you end up breaking more than one needle while learning to stitch, it may be that you are using a spool of thread that is wound too tightly.
To loosen it, take the piece of thread between thumb and forefinger and quickly run it back and forth until it breaks free from any tight coils. This is a crucial step in how to hand embroider shoes.
Step 7: Stitch the Pattern Onto the Leather
Begin stitching at the back of your work. How close to the edge you place your stitches is up to you, but I suggest starting with about 1/16″ or less. Pull your needle through until it is just emerging at the front of your project, then lift your hoop and tighten it just a bit so that there is enough thread left between for you to pull up another stitch without undoing everything.
How long this “tail” will depend on how tightly wound your spool of thread is, along with other variables specific to each thread brand. Tug gently on both ends of the tail while holding onto either side of your fabric – if they are secure, cut off any excess bottom above the knot, otherwise re-knot your embroidery thread and continue stitching.
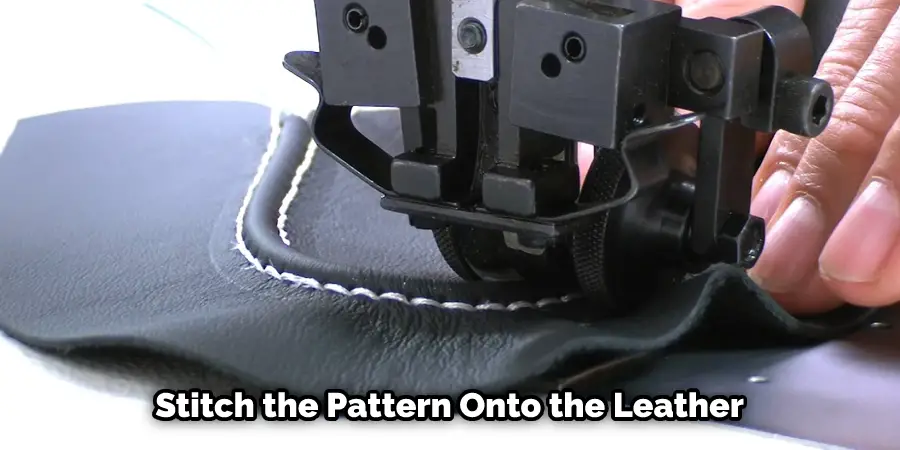
How much to tighten the hoop after each stitch again will depend on the thickness of your Leather, how large your needle is, along with other factors specific to each person’s technique. I prefer pretty tight stitches that are at least 1/16″ apart. How tight or loose you go is entirely up to you.
If you find that you are getting wrinkles in the fabric once all the stitches have been pulled up, it may be because you did not start pulling tightly enough at first or perhaps because your project has become loosened from using different threads over time.
Step 8: Continue Stitching
Continue stitching around until you reach about 1/4″ away from the edge of your project. How close together or far apart you make your stitches are all up to personal preference. Still, I always shoot for about 1/16″ between. If you are stitching around a curved area, try using one hand to hold the hoop flat against the Leather while the other pulls each stitch, making sure not to loosen it too much in any one place.
Step 9: Secure Your Stitching
At this point, no matter how tightly you have placed your stitches, lifting on either side of your work will cause everything to slip out of place. To prevent this from happening, tie off your thread by bringing it down through the back of your work and its corresponding loop at the front before cutting off any excess thread. Again, how many knots you place depends on how tightly your spool is wound and other factors specific to each thread brand.
Step 10: Finish Stitching
Once all the stitching has been finished, give your project a gentle tug in opposite directions to ensure that everything is secure. If any holes open up between stitches at this point, re-knot one strand of floss and use it to sew up the hole by passing the needle through several times before cutting off excess thread.

How you finish stitching around an area can be as straightforward or as elaborate as you wish using french knots, backstitches, cross-hatching with different colored lines, etc. My shoes look more like they were made using commercial machine-embroidery techniques; I created a pattern that mimics commercial zigzag stitching using backstitches. These steps will help in how to hand embroider shoes.
Tips and Warnings
Tips
- If you’d like, you can use various colors for the stitches. I’ve done red and green several times before with great results!
- If your embroidery thread gets tangled while working on a shoe, don’t pull it out or cut it off – continue to work around that strand, hiding it under the stitched designs. You can tease out the strand after you’re finished with the embroidery.
- When your embroidery thread is very long, knot it in several places to keep it manageable before working on a shoe.
- Wear gloves, or you can put petroleum jelly (Vaseline) around the nail bed and under your fingernails. Then use tape over areas where the color will be applied; remove the tape when done!
- Use painters’ masking tape to attach the stencil along its top edge to a board or window ledge. Then use paperclips to secure the stencil along its bottom edge. Finally, place a small piece of tape over the stencil’s center X to prevent ink from seeping underneath.
Warnings
- Don’t press too hard with the calligraphy pen, or you may tear through the fabric or create an unintended mark on another section of your shoe.
- Baby wipes are excellent for removing ink mistakes without harming the Leather. Dampen one in water and use it to wipe away any error before it has a chance to dry!
- Always have clean paper towels nearby when working, because accidents sometimes happen!
- Make sure your stencils are securely attached to the shoes so they won’t shift around while you work.
- Be prepared for some trial-and-error if this is your first time trying hand embroidery on shoes – practice on scrap until you achieve the desired result.
Conclusion
We hope you have learned how to hand embroider shoes. Hand embroidering shoes is a time-consuming and tedious process. But, it can add an extra level of detail to your shoe design that makes the final product more unique. We recommend using some of these tips when handing embroidering shoes for your next project!