Introduction
Princess Mononoke shoes is a type of traditional Japanese footwear (geta) featuring the character from Hayao Miyazaki’s “Princess Mononoke.” It is also called “Mono-Geta” or “Mononoke Geta” among fans. The first pair was produced in 1999, and since then, they have been widely reproduced.
The Princess Mononoke shoes are handmade. They have a soft, breathable insole and an adjustable buckle on the side that allows for different calf sizes. The shoe is also lined with elastic to hold it in place. These shoes can be made from many materials such as leather, suede, or canvas fabric. There are no laces because they make it easier for children to put them on themselves and pull them off by themselves if needed. In addition, the soles of these shoes will not slip, which makes them perfect for rainy days because your child won’t need to worry about their feet getting wet.
Today I am going to discuss a technique on how to make Princess Mononoke Shoes.
Advantages of Princess Mononoke Shoes
1.Perfect Folded Shoes
The Princess Mononoke shoes can be folded perfectly into a small shape. As a result, it is easy to carry, and the size is convenient for women to put in their purses or pocket.
2.Women Professional Model
Most of our customers are models, fashion bloggers, and designers who actively participate in forums and microblogs. They will share the experience of wearing our shoes with many people on the internet during blogging events, which increases brand awareness. Brand popularity is directly proportional to the mass communication effect! We were hoping you could become a new star that carries our Princess Mononoke brand name!
3. Convenient size and logo display
The shoes are the same size as European and American feet, no need to try them on. You can wear them directly after receiving them. The logo is clear when wearing it so that customers have a more intimate experience with your product! You can choose a shoe with high value and low price for test marketing or pre-sales advertising! Professional advice from our customer service manager will help you promote brand awareness at a low cost.
How to Make A Princess Mononoke Shoes: Step by Step DIY Guide
What you need:
Item Quantity Deer Skin 1 piece (3mm thick) #11 awl or #16 awl Stitch Scissors Cutting Mat Rubber Glue Wooden Block Template for Princess Mononoke Toes Shoe Last Piece Paper Ruler Pencil Sewing Needle *You can buy these items from here.
Step 1:
Place the shoe last and trace it with a pencil on paper.
Step 2:
Fold the skin into two parts along the horizontal line and cut it along a vertical line. The height will be 0.9 cm shorter to reach the point at which you want to attach a heel at the shoes’ base in Step 4.
Note that deerskin is very thin and weak, so there’s a possibility that you may accidentally tear or puncture it when using big awls. In this case, just use smaller awls carefully. Also, it’s a little bit hard to sew because deerskin is too thin, so you need to have experience.
Step 3:
Stitch the shoe last with awls. Leave a hole in the middle area. If you use smaller awls, it will be easier for you to make points of Princess Mononoke’s toes.
Step 4:
Sew the heel on the shoes’ base. You can find more details about ‘How to Sew Heel at Shoes’ Base’ here.
Note that when sewing a heel on shoes’ base, split deerskin into two parts along both sides. Then, soak them separately with rubber glue before sewing. I recommend that you use rubber glue to make shoes as they are tough materials, and it will hurt your skin if you directly sew them.

Step 5:
Cut out fabric that covers the bottom of Princess Mononoke’s feet. Sew a small round point at both ends of the fabric.
Step 6:
After sewing, flip over the fabric covering the foot and hold it with the thumb on top. Insert shoe last into the hole. Sew fabric onto the shoe carefully. You can seal gaps by using rubber glue.
Step 7:
Make a big toe part. You can use paper to make the shape, but I recommend that you cut it out directly from the shoe last and then put it on your fabric to trace it so that the sewing will be easier. After tracing, draw straight lines according to the pattern:
Step 8:
Sew toes’ parts by using red thread. (This is my first time making these shoes, so I didn’t add any decoration at this moment.)
You can sew them at the same height as the heel or raise them higher than the heel’s tip. You can make a lower one according to your style and the height of the heel.
Step 9:
Make a pointy part of toes and heel by using awls. (This is my first time making these shoes, so I didn’t add any decoration at this moment.)
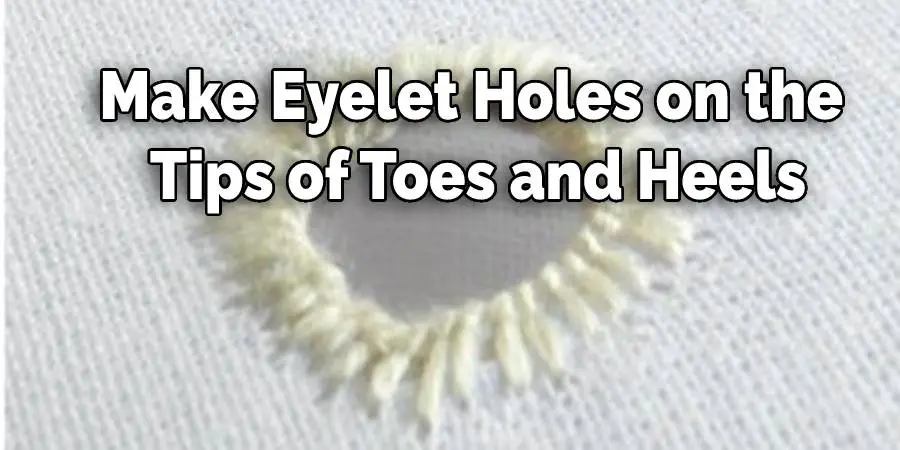
Step 10:
Make eyelet holes on the tips of toes and heels. If you don’t want to use your eyes in Princess Mononoke’s shoes, ignore this step. Instead, you can use #6 or #8 eyelets.
Step 11:
Cut out pieces for a mouth and ears with paper. Then fold them into two parts along the vertical line and cut out two parts diagonally from each tip.
Before cutting out the mouth, cut out a piece from inside and two pieces from outside of it. Then you should attach them with an awl. This part will be like Princess Mononoke’s teeth :
Step 12:
Sew the backside of hair/mouth/ears’ parts by using black thread. (This is my first time making these shoes, so I didn’t add any decoration at this moment.)
Step 13:
Make a tongue for an opening of Princess Mononoke’s mouth or an ear. You can make it easily with fabric, red stitch, and rubber glue.
Step 14:
Finally, tie a string around the neck of Princess Mononoke’s shoes and sew eyes onto it with black thread. Note that you should use small awls to try hard and deep sewing points.
Precautions While Making Princess Mononoke Shoes
- Working with felt is a very detailed process. Do not hurry and take your time while working on the shoes.
- Take care to use sharp scissors when cutting out the pattern. Place material over an ironing board and press down firmly before cutting.
- When using a strong glue like Elmer’s, try to avoid getting any of it on your hands as it may be hard to wash off later without damaging your skin or nails (if you have fake ones). It would also be a good idea not to wear dark clothing until after you are done working with the glue. Use rubber gloves if that doesn’t work for you!
- It is best if wearing sandals when making Princess Mononoke Shoes. The sculpture can get a little messy, and you don’t want to damage your favorite pair of shoes.
- Feel free to tweak the pattern design to fit your body shape better or meet your individual needs. Just make sure that all lines are still clearly visible, especially on the foot portion of the base shoe. Also, make sure that the final result is as symmetrical as possible before moving onto the painting.
Conclusion
If you want to make Princess Mononoke Shoes, first start by gathering the materials. Then you can follow the process we have mentioned here. Ensure proper safety throughout the process. Thank you, and have a good day!
You may read also- Is It Ok to Wear Running Shoes for Walking?