What is old is new again. This saying rings especially true in the world of fashion, where trends from years past often make a comeback. So if you’re looking to add a touch of retro style to your wardrobe, why not try making your rope-soled shoes. It’s an easy project that you can do at home with minimal supplies. So keep reading to learn how to make rope soled shoes!
Making your rope-soled shoes is a fun, easy way to get unique shoes that are perfect for summer. You can make them any color or pattern you like, so they’re perfect for showing off your personality.
Required Tools and Materials
- Rope
- Scissors
- Sharp knife
- Measuring tape
A Stepwise Guide on How to Make Rope Soled Shoes
Step 1: Preparation
The first step for Making Rope Soled Shoes is to measure the rope. Then, depending on how high you want your shoe, cut out a piece of string slightly higher than the desired length of the shoe. Ensure the knots are facing inward and not touching your feet. If you like, you can also make a string (parallel to the other one) and tie both together and cut equal lengths. This will make it more accessible during multiple weaves.
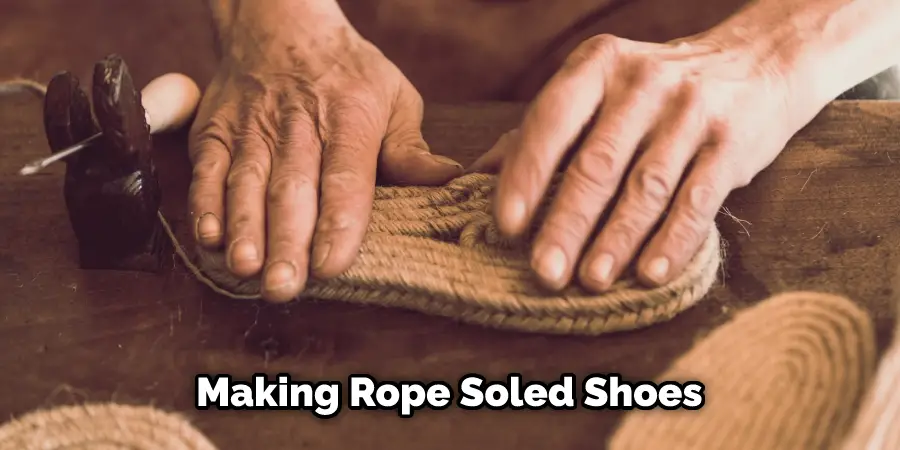
Step 2: Traditional Sole Rope Weave
Now that the rope is cut and knotted together start weaving. The first step for Making Rope Soled Shoes: Traditional Sole Weave is to weave your rope around itself in a crisscross manner until you go two inches down from where the toe starts. Tie it off there, but make sure that when tying the knot, you leave a loop at the top so it won’t come undone while working on your shoes. Depending on your preference, you can work on both ropes simultaneously or one by one.
Step 3: Handcrafting the Sole
Now Making Rope Soled Shoes is more than halfway through. The knot on top of your shoe should be two inches away from the thicker rope. Take out this thicker rope and tie it around the thinner one three inches below where you initially tied off. After tying it off, cut off an equal length of thick rope and make another double knot with the part of the thick cord sticking out below, making sure both knots are facing inward.
Weave back up again using only the thin cord until you get about eight inches away from your left off before starting on your new thinner string cord. This time, tie another piece of rope twice on itself, creating another loop for the shoelace to go through. Next, tie a secure knot at least ten inches away from where you left off. Cut off the resulting cord and tie it around the next loop two inches above. Continue this process until you get to the top.
Step 4: Adding Natural Rubber
The fourth step of Making Rope Soled Shoes is to add natural rubber. Rubber can be found under the beds at your house from fridges, washing machines and other things that have had contact with it. First, choose a section of rubber that has been worn down so it’s flat and not sharp on any edges. Next, cut out pieces of the flat rubber portions, sanding them in between each stripe (so they do not stick together).
Stick this onto the shoe’s bottom in the appropriate length you desire (the longer strips should be placed in between). Use sandpaper to sand it down in places where there are significant gaps or parts are sticking up during weaving. This will help when you go back over with your second sole.
Step 5: Second Sole Rope
This step is finishing off the second sole. Use another piece of rope that will be used for weaving instead of using string because it’s too short. It should be around 2-3 feet long, depending on how big your shoe size is.
Decide where you want to lay it down and string in between each row, making sure that all your knots are facing inward, so they do not stick out while wearing them. After completing the rows, make a circle between each knot in twos (so there are four loops). Make sure that each loop is tight against the rope.
Step 6: Weaving the Canvas
Now Making Rope Soled Shoes is only a few steps away from completion. Cut out a small strip of canvas and tie a knot on each end of it, so no two strands are running parallel. Thread this piece in between each set of rope that makes up the rows, making sure that they are all facing inward just as before.
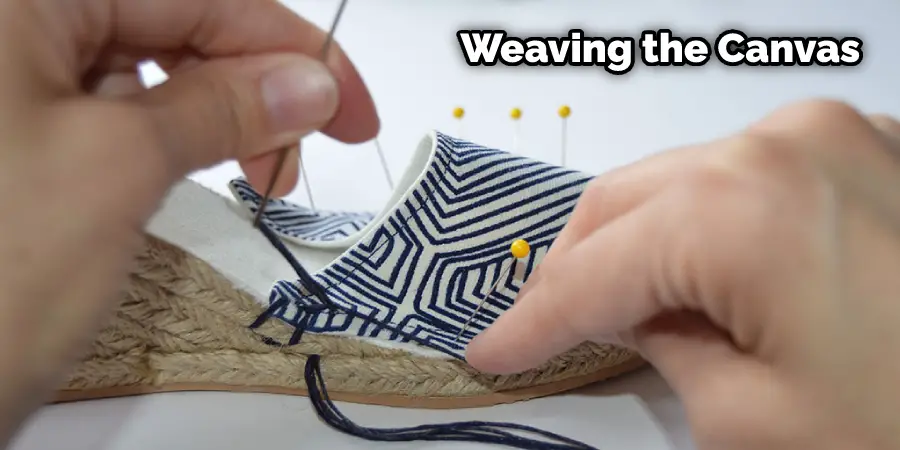
Repeat until you have reached your desired length, and then cut off any excess from both ends. This can be lacing if you want an adjustable shoe instead of one with straps or buckles, so they fit tightly around the foot.
You can use a fork or metal object such as a screwdriver, depending on what’ll fit the best into the hole, making sure not to tear through all three layers of the canvas (although wear and tear will most likely occur over time). This is a crucial step in how to make rope soled shoes.
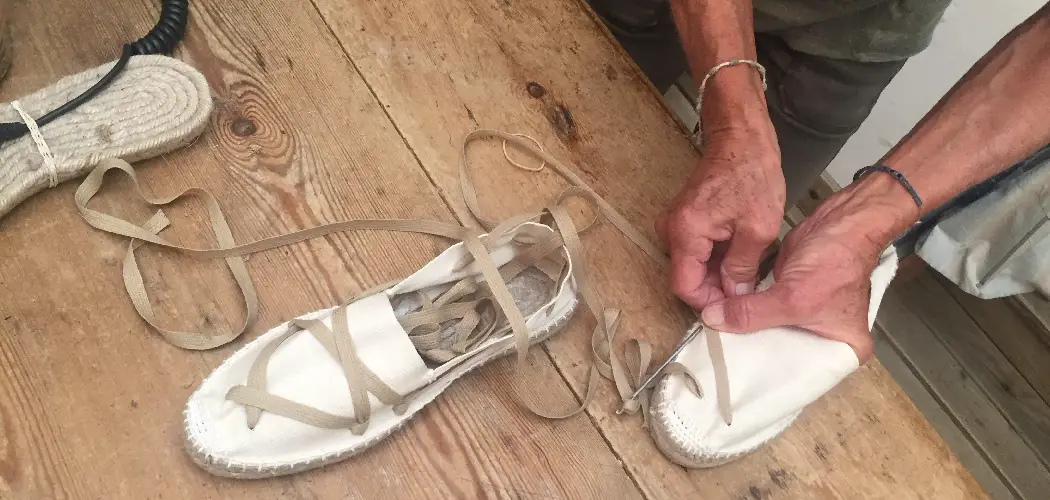
Step 7: Tailor Weaving
Tie a string (you can use shoelaces and cut out the middle parts if you don’t want to buy new ones) around the first row of holes and start weaving all three layers of canvas together by bringing your string under one over two and under two. Make sure that your knots are facing inward. Keep on repeating this process as tight as you can, making sure not to weave too long past the end; otherwise, Making Rope Soled Shoes will be challenging to tie up.
Step 8: Hand-Sewing the Espadrilles
Use a thin needle and thread to sew Rope Soled Shoes together where you left off at the end of your weaving. Tie a knot at the end of the sewing process, so it does not come undone. Cut off any excess string or even weave back through Making Rope Soled Shoes if need be based on what type of Make Rope Soled Shoes you are making.
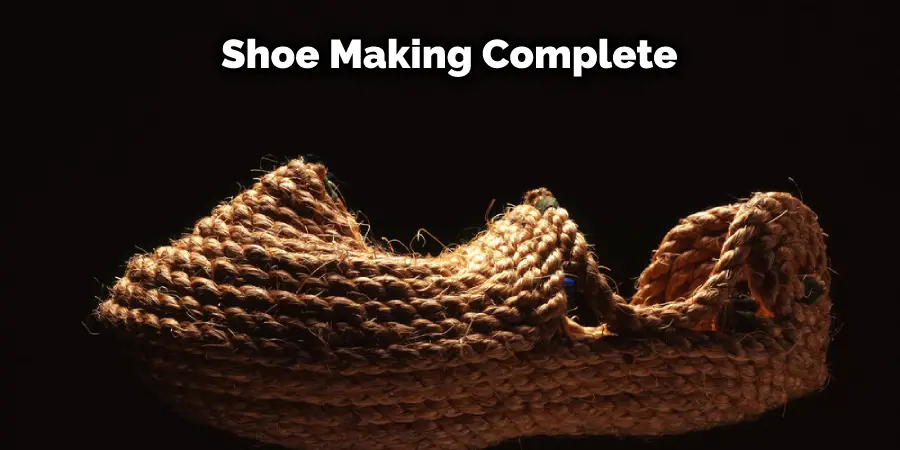
Step 9: Finishing Touches
The final step of Making Rope Soled Shoes is to finish off the ends using either a lighter or another heated object. Do this for both Rope Soled Shoes, so they are symmetrical and not fraying over time. Use sandpaper on any sharp edges where the rope soles meet your shoe’s fabric so Make Rope Soled Shoes do not poke through. Making Rope Soled Shoes also helps if you use a thick thread similar to your shoe. These steps will help in how to make rope soled shoes.
Tips and Warnings
Tips
- Make sure to purchase thick-soled shoes before starting this project, as it will be much more difficult if you start with thin-soled shoes.
- When measuring the length of your rope, make sure you begin counting from the tip of your big toe and not the tip of your shoe’s sole. If you measure from the tip of your shoe’s sole, then when wearing them, they will constantly slip off and not fit properly.
- While wearing your rope soled shoes, it is essential that you keep your angles around 15 degrees, or else they will be too challenging to walk in. On the other hand, if the angles are too significant, they may also slip off more easily.
Warnings
- When wearing your rope soled shoes, you must be careful on hard surfaces as the force of each step can cause them to break.
- It is essential that you keep in mind that this project isn’t limited to adults and can be made for anyone. However, when making these shoes for children, you must make sure they are not wearing socks or may slip out of the shoes easily.
Which Type of Materials Should I Use for Making My Own Rope Soled Shoes?
The type of material you use is entirely up to you and your preferences. However, we recommend using a durable and lightweight fabric such as linen or cotton. Also, please make sure the material is at least 1/4 inch thick before cutting it into strips. For most people, this is enough to support the soles of their shoes. If you are concerned about durability, consider using natural fibers such as hemp or jute.
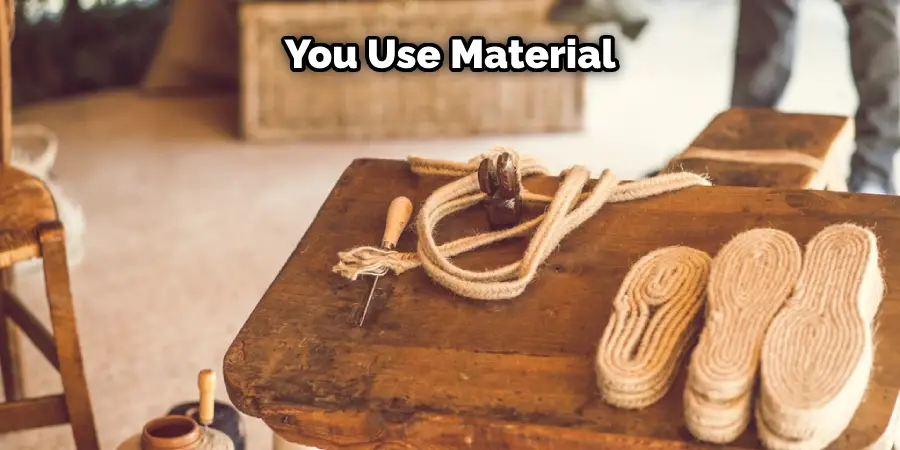
Do not use thin materials like silk unless reinforced with several layers of linen or cotton since these materials will break down very quickly if they aren’t strong enough to support your weight. Also, do not choose fabrics that stretch easily since this may compromise the stability of your shoe’s sole during use.
Conclusion
We hope you’ve learned how to make rope soled shoes. The soles of these shoes are made from yarn, which is knitted into a long strip. Two strands of yarn are held together and then looped around your thumb to create a knot that will form the hole for your shoelace.
You can choose different colors or patterns of yarns, so you have an interesting-looking pair! Once you’ve finished making the sole with knots, tie off each end on either side of where your foot touches down when walking. These “ties” should be tight enough to keep the loops in place while still comfortable walking on them.