There are many reasons why you might want to attach SPD cleats to your shoes. Maybe you’re a cyclist who wants to be able to ride your bike on the weekends, or perhaps you’re training for a triathlon and need the extra power and speed that SPD cleats provide.
This article will discuss how to attach spd cleats to shoes. No matter your reason, follow these simple steps to attach SPD cleats to your shoes and get started!
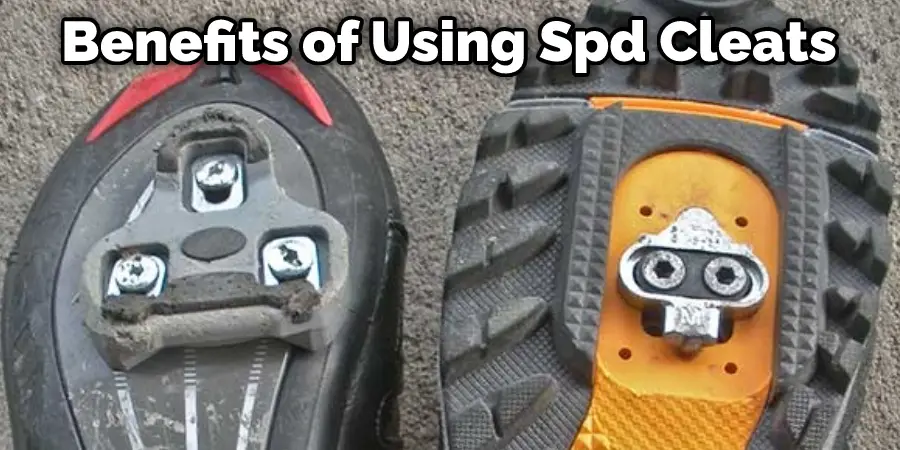
SPD cleats are small plastic attachments that clip into the bottom of your cycling shoes to improve power transfer between your legs and the bike. Attaching spd cleats has been an issue for many cyclists at one time or another, but there are simple solutions.
A Step by Step Guide on How to Attach Spd Cleats to Shoes
Step 1: Remove the original sole of the shoe
The first step is to remove the old sole of the shoe. How this is done will depend on how hard you try to remove it. If you are having trouble with it, use a screwdriver or knife to cut through some points along the edge of where your new cleats will be attached. You can also try soaking shoes in warm water for about 30 minutes before attempting this if that does not work either.
Step 2: Place Spd Cleat on the new shoe
Once your old soles have been removed, place your SPD cleat onto your shoe where you want it to attach. They are centered and at an appropriate height for yourself based on what works best with leg and body positioning.
Step 3: Mark your drill points onto the shoe
Mark where you will need to attach the cleats on the outsole of your shoes with a pen or marker so that they are easily noticed when you go to drill. You can also use a string along the edge before marking it, so it’s easier to see and keep centered if needed.
How you choose to mark up your shoes is dependent on how well the pen or marker stays on, but remember that whatever method you choose will be under high pressure because of the weight of your body pushing down on it later!
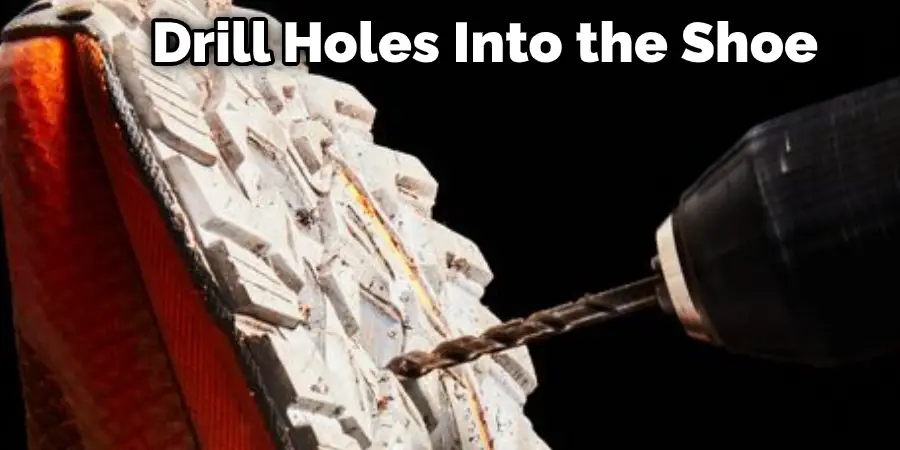
Step 4: Drill holes into the shoe
Now take a drill bit that has a smaller diameter than the screw size and attach it to your drill. Alternatively, you can use a screwdriver if you do not have access to a drill bit or drill, but make sure that the screw is short enough, so it does not go through the sole of your shoe when putting it on!
Next, drill into the marked areas of your shoe where you want to attach your cleats. DO NOT DRILL ALL THE WAY THROUGH YOUR SHOE! This will only weaken them and cause trouble later, especially if you plan to walk around often in them as well.
Step 5: Attach screws
Once you have drilled holes deep enough for each of the screws, attach them by screwing them in tightly to ensure they stay put once finished. You can also use super glue or epoxy if necessary.
Step 6: Attach cleats to the screws
Finally, once your screws have been attached, you can put your SPD cleat onto them and secure it. How tight you need to screw in each cleat will depend on how well they fit onto the shoe, but if they are too loose, they may come off during a ride or run when going from walking to biking. How you choose to do this is up to you, but make sure that both shoes look the same when finished!
Step 7: Put sole back into the shoe.
Now find where your original sole would go in the footwear and place them back together again. How hard it is for this step depends on what material your outsole is made out of and how well your cleats have been attached to them. How you go about doing this is really up to you, but if you have trouble, try using an alternative way of attaching the sole by other methods such as glue or tape.
Step 8: Enjoy!
Once completed, put your shoes back on and test whether or not they fit correctly by making sure that each shoe feels comfortable when standing in them flatly with no pressure against the pedals. Next, test out different angles to see where it works best for yourself while riding your bike and enjoy your newly modified shoes!
Everything should be the same as before, except now your feet will feel better supported during cycling thanks to cleat attachments explicitly made for SPD pedals! These steps will help in how to attach spd cleats to shoes.
You Can Check It Out to Make Shoes Slippery for Dancing
What Are the Benefits of Using Spd Cleats?
The importance of having a good pair of shoes with spd cleats cannot be stressed enough for any cyclist. If you are training, using regular sneakers or even sandals can severely affect your speed and performance.
It’s been proven that blood circulation through the legs is much lower when cycling with regular footwear compared to using special cycling shoes with built-in pedals because regular sneakers do not fit well on spd cleat pedals which means that you have to reach down while pedaling, putting more strain on your knees and hampering the flow of blood through your legs. Not a pretty picture, especially if you’re doing high-intensity workouts.
All these problems go away when you buy professional cycling shoes with spd cleats. Here is how:
- Easier pedaling motion means that you will be faster and more efficient.
- Faster, better pedal stroke due to direct contact between your feet and pedals gives you a “locked-in” feeling on the bike. This also enhances blood circulation through your legs, making for an excellent training experience.
- Vastly reduces strain on joints, especially knees, since these are no longer being pushed back upon during strenuous efforts. In addition, cycling shoes are designed ergonomically with wide cleats which evenly distribute weight across the sole of your foot, maximizing power transfer onto pedals while reducing strain on the lower body muscles. Your joints will thank you later!
- Lightweight construction with zero heels or arch support provides more balance and stability, offering a competitive edge during races.
- Allows you to pedal all day with no foot fatigue whatsoever, making for an enjoyable experience.
Conclusion
The spd cleats should be attached to the shoes with screws or bolts. They can then be adjusted for how much tension is needed based on your personal preferences and cycling style. When you have them in place, they will keep your feet secure when pedaling to feel more comfortable while riding! We hope you find this article on how to attach spd cleats to shoes helpful.